Up-level your photography business
From scheduling and lead tracking to automated templates and reporting, ShootQ streamlines every aspect of your business.
Save valuable hours with ShootQ
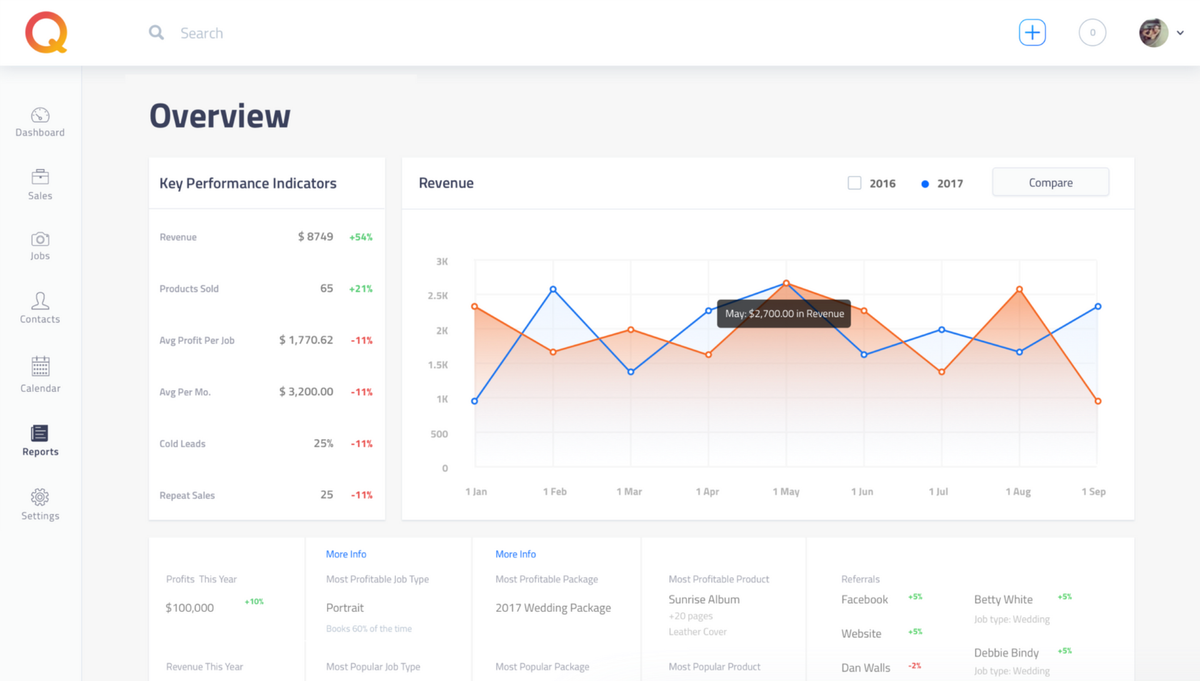
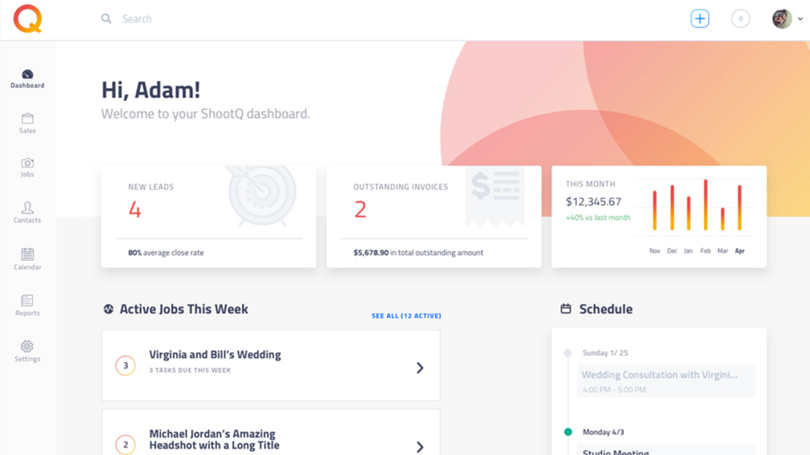
All-in-one dashboard
- All business info in one place
- Track tasks for upcoming shoots
- View your weekly schedule
- Monitor sales and performance metrics
Lead tracking simplified
- Monitor and track every lead
- Make sure nothing falls through the cracks
- Manage stages according to how you work
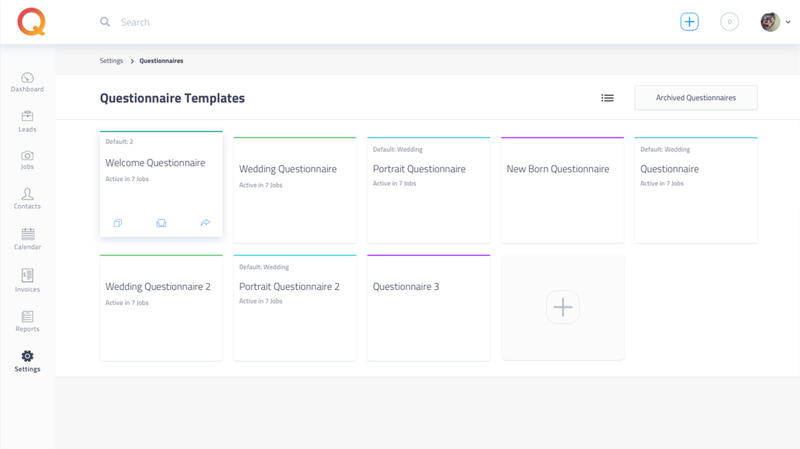
Templates for everything
- Automate every part of your sales process
- Pre-build proposals, contracts, emails, and invoices
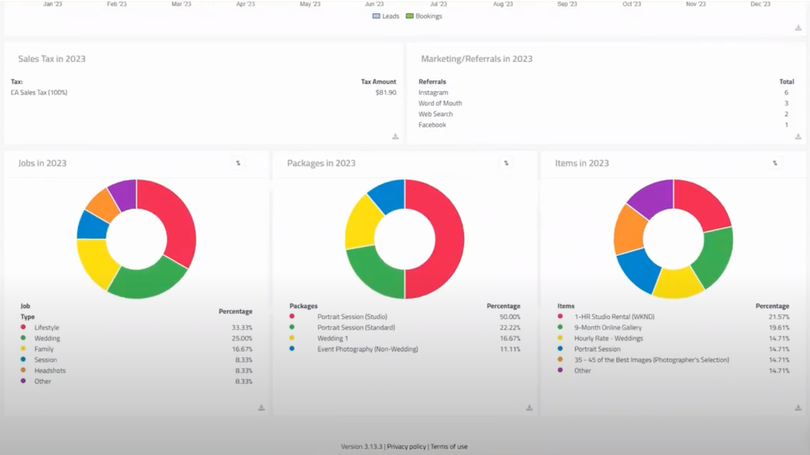
Comprehensive reporting
- Detailed business reports
- Analyze business health
- Identify profitable products and services
What our customers have to say...
Testimonials
This is a paragraph. Writing in paragraphs lets visitors find what they are looking for quickly and easily.
This is a paragraph. Writing in paragraphs lets visitors find what they are looking for quickly and easily.
This is a paragraph. Writing in paragraphs lets visitors find what they are looking for quickly and easily.
This is a paragraph. Writing in paragraphs lets visitors find what they are looking for quickly and easily.
ShootQ completely changed the way I run my business.
Don Bryant Thompson

I don’t know how anyone has a studio without this program.
Sara France

We want to focus on art, and ShootQ definitely lets you do that.
Misty Miotto

Pricing for every budget
$39.95/month
Starter
or $399 billed annually (get 2 months free)
Perfect for growing studios with up to 3 users.
Plan includes:
- Unlimited jobs
- Unlimited job themes
- 3 users
$59.95/month
Studio
or $599 billed annually (get 2 months free)
For the studio with multiple employees or brands.
Plan includes:
- Unlimited jobs
- Unlimited job themes
- 6 users
$79.95/month
Hub
or $799 billed annually (get 2 months free)
For larger studios with multiple brands or employees.
Plan includes:
- Unlimited jobs
- Unlimited job themes
- Unlimited users
- Create and share session offerings online.
- Offer sessions year-round to fill your schedule.
- Easy setup for seamless mobile bookings.
- Customize offerings to fit client preferences.
- Streamline bookings for a professional experience.